ConceptHMI Web Help
Starting a new application
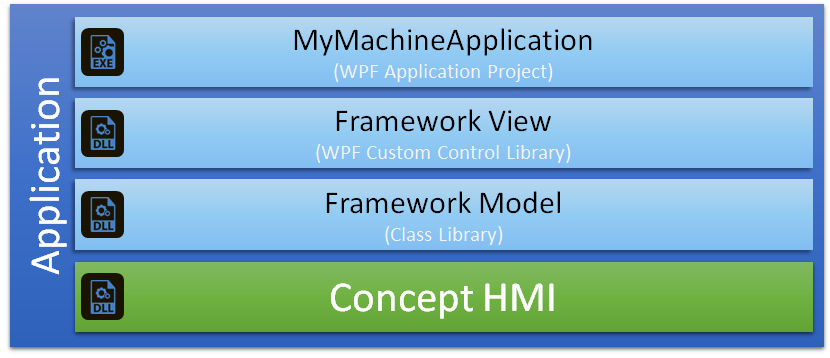
A good practice to organize your Visual Studio solution is to split the application in two projects. One project for the application and another project for the application's framework.
The purpose of this separation is to regroup all of the data model and intelligence of the software in a library (DLL) and not in the executable of the application (EXE).
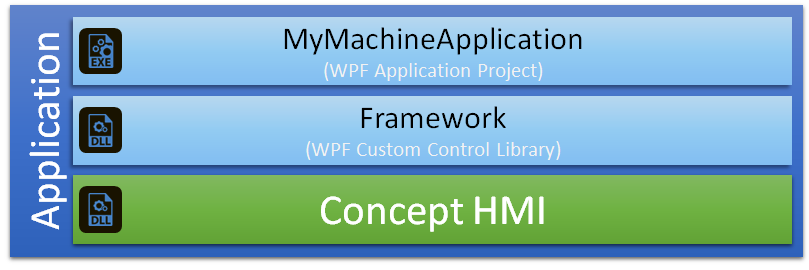
This project will contain the data model and the controller of the application. In this project, you can define the model, the view models, the views and others elements of your application.
To set up this project, add a new WPF Custom Control Library in the Visual Studio solution.
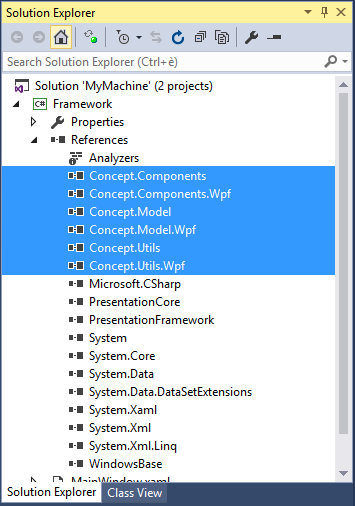
To benefit from all the features of Concept it is necessary to add the Concept libraries as references of this project.
 |
To manage Concept libraries version by project it is recommended to copy the Concept libraries locally . |
You must delete the file CustomControl1.cs to clean the project.
This project will be the entry point of the application and will be used to initialize the framework with the ConceptBoostrapper (See next chapter Initializing a new application).
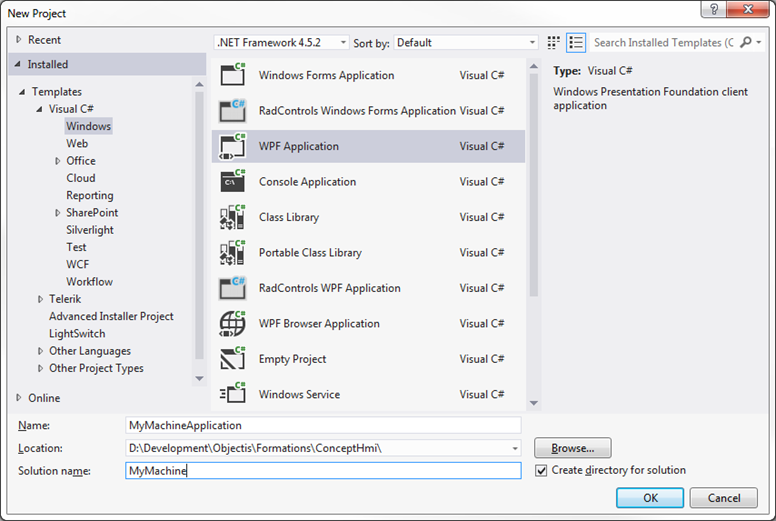
To set up this project, add a new WPF Application in the Visual Studio solution.
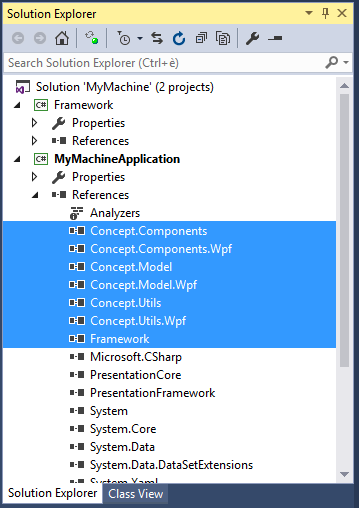
When the application is created, it is necessary to add the Concept libraries and the framework project as references to benefit from all the features of these elements.
|
To manage Concept libraries version by project it is recommended to copy the Concept libraries locally . |
Edit the file App.xaml and delete the property StartupUri. The view automatically shown when the application starts is managed by the ConceptBoostrapper class (See next chapter Initializing a new application).
<Application x:Class="MyMachineApplication.App"
             xmlns="http://schemas.microsoft.com/winfx/2006/xaml/presentation"
             xmlns:x=http://schemas.microsoft.com/winfx/2006/xaml">
   <Application.Resources>
   </Application.Resources>
</Application>
Edit the file MainWindow.xaml and define the content of the main window. See below for a basic example of the main window code.
<Window x:Class="Framework.MainWindow"
        xmlns="http://schemas.microsoft.com/winfx/2006/xaml/presentation"
        xmlns:x="http://schemas.microsoft.com/winfx/2006/xaml"
        Title="MyMachine" Height="400" Width="600">
    <Grid>
        <TextBlock Text="Hello World!"/>
    </Grid>
</Window>
To work with the MVVM pattern or to use the same model with a different graphical framework it is necessary to separate the model from the view.
The Framework Model will contain the data model and the controller of the application.
The Framework View will contain the different views and the view models to display the Framework Model.
Concept provides a bootstrapper in order to ease the initialization of your application. The bootstrapper provides a lot of features :
To take advantage of these features in your application, the first step is to create a new class usually named Bootstrapper in the application project. This new class must inherit from ConceptBootstrapper and Implement its abstract method CreateMainWindow. A basic bootstrapper creating the main window of the application is shown below.
namespace MyMachineApplication
{
    public class Bootstrapper : ConceptBootstrapper
    {
        protected override Window CreateMainWindow()
        {
            return new MainWindow();
        }
    }
}
To use the bootstrapper, you must edit the file "App.xaml.cs" of the application project and override its OnStartup method. In this method you must create a new Bootstrapper object and call its method Run. This method automatically starts all the services of bootstrapper.
namespace MyMachineApplication
{
    public partial class App : Application
    {
        protected override void OnStartup(StartupEventArgs e)
        {
            base.OnStartup(e);
            Bootstrapper boot = new Bootstrapper();
            boot.Run();
        }
    }
}
By default, ConceptHmi provides and displays a splash screen during the application startup.
If the default splash screen doesn't suit you, you can define a custom splash screen. To create your splash screen, the first step is to create the window which will be the splash screen.
<Window x:Class="Concept.Model.Wpf.MySplashScreen"
        xmlns="http://schemas.microsoft.com/winfx/2006/xaml/presentation"
        xmlns:x="http://schemas.microsoft.com/winfx/2006/xaml"
        xmlns:d="http://schemas.microsoft.com/expression/blend/2008"
        xmlns:mc="http://schemas.openxmlformats.org/markup-compatibility/2006" mc:Ignorable="d"
        Title="MySplashScreen" Height="380" Width="577"
        AllowsTransparency="True" Background="Transparent"
        WindowStyle="None" WindowStartupLocation="CenterScreen" ShowInTaskbar="False">

    <Grid Background="Transparent">
        <Image Stretch="Uniform" Source="SplashScreen.png" />
        <TextBlock Text="MyText" FontSize="28" Foreground="White"
            Margin="10,110,0,0" FontFamily="Century Gothic" FontWeight="Bold"/>
    </Grid>
</Window>
When the splash screen window is created, the best way to use it is to work with the constructor of the bootstrapper. You can create an empty constructor and set your custom splash screen in the call to the base constructor as shown below.
namespace MyMachineApplication
{
    public class Bootstrapper : ConceptBootstrapper
    {
        public Bootstrapper(): base(new MySplashScreen()){}

        protected override Window CreateMainWindow()
        {
            return new MainWindow();
        }
    }
}
If you have any services which have to be started at application startup and stopped at the application shutdown, you can override the load and unload methods of the bootstrapper.
namespace MyMachineApplication
{
    public class Bootstrapper : ConceptBootstrapper
    {
        public Bootstrapper(): base(new MySplashScreen()){}

         protected override Window CreateMainWindow()
        {
            return new MainWindow();
        }

        protected override void Load()
        {
            base.Load();

            // Start your services
            FrameworkController.Instance.Load();
        }

        protected override void Unload()
        {
            base.Unload();

            // Stop your services
            FrameworkController.Instance.UnLoad();
        }
    }
}