Arduino, which received an Honorary Mention in the Digital Communities section of the 2006 Ars Electronica Prix, is now fully compatible with Ocf Server. It means that every client (can be oStudio – Live Tuning or your own application with Ocf Client) can connect to an Arduino single-board microcontroller. As usual, the client can interact with the Arduino board LIVE!
You can also get the PDF here.
Here is the contents:
- Introduction
- Step by step procedure
- Download and setup
- Copy Ocfe files to Arduino IDE libraries
- Extract the example
- Compile and upload the example to your Arduino target
- Test and enjoy with oStudio – Live Tuning
- More to do with oStudio – Live Tuning
Let’s begin!
1. Introduction
This document provides all the elements you need to test OcfEmbedded on Arduino.
Read the OcfEmbedded programmer guide for more detailed information.
2. Step by step procedure
2.1 Download ans setup
- Download oStudio – Live Tuning and install it.
- Download ArduinoOcfe_Application_Note.zip and open it.
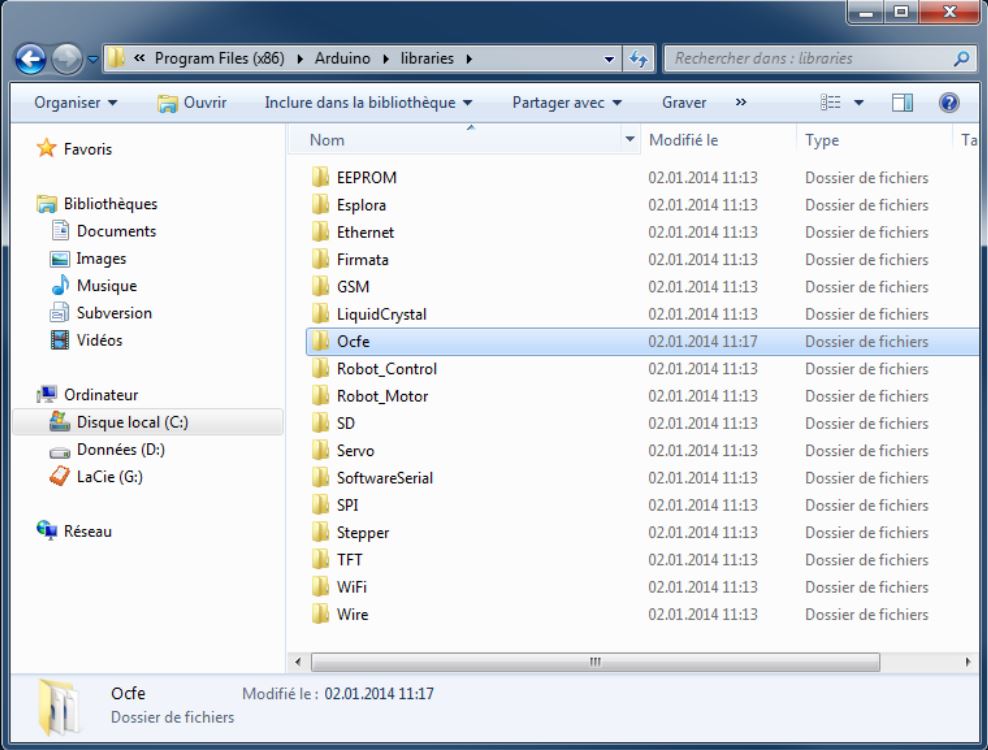
2.2 Copy Ocfe files to Arduino IDE libraries
From the ArduinoOcfe_Application_Note.zip file, folder “libraries” :
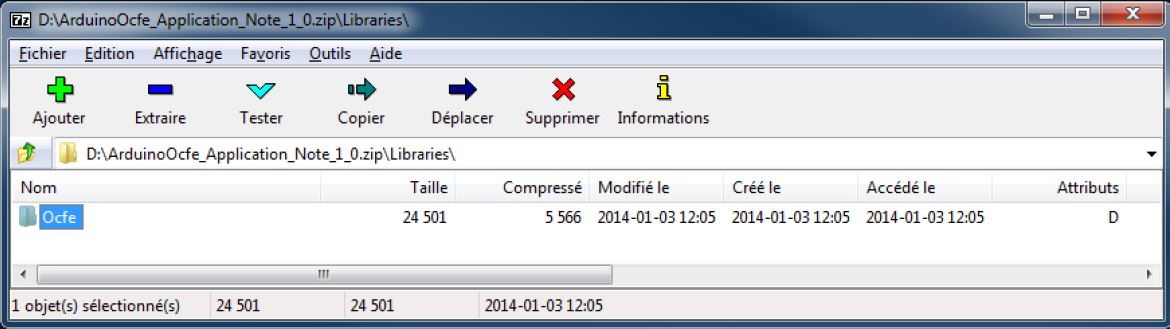
Extract the folder “Ocfe” to the “Arduino IDE” libraries folder (which is typically C:\Program Files (x86)\Arduino\libraries) :
2.3 Extracte the example
From the ArduinoOcfe_Application_Note.zip file, folder “Example”:
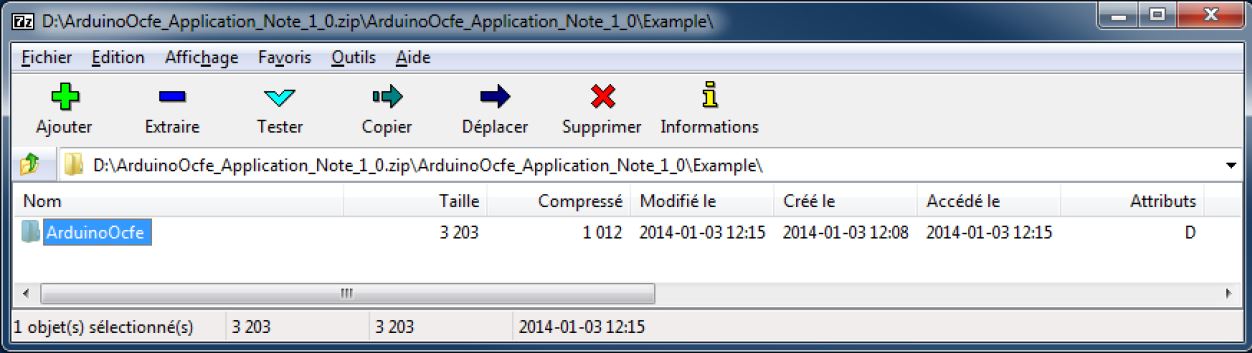
Extract the ArduinoOcfe folder to the folder where you usually store your Arduino projects.
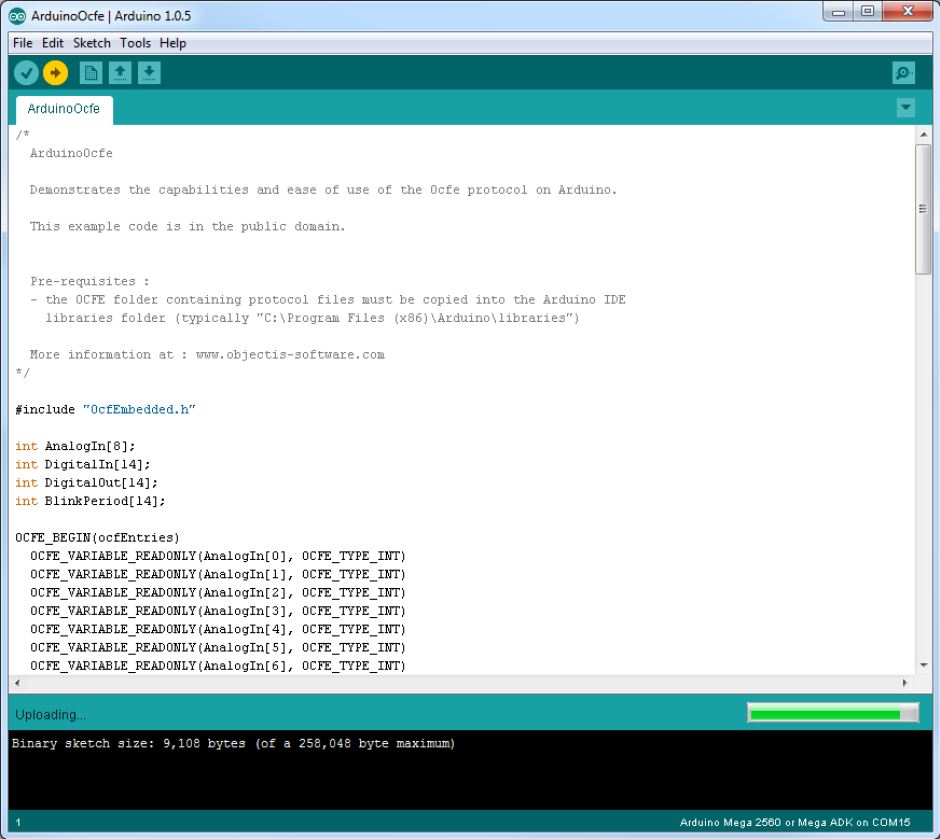
2.4 Compile and upload the example to your Arduino target
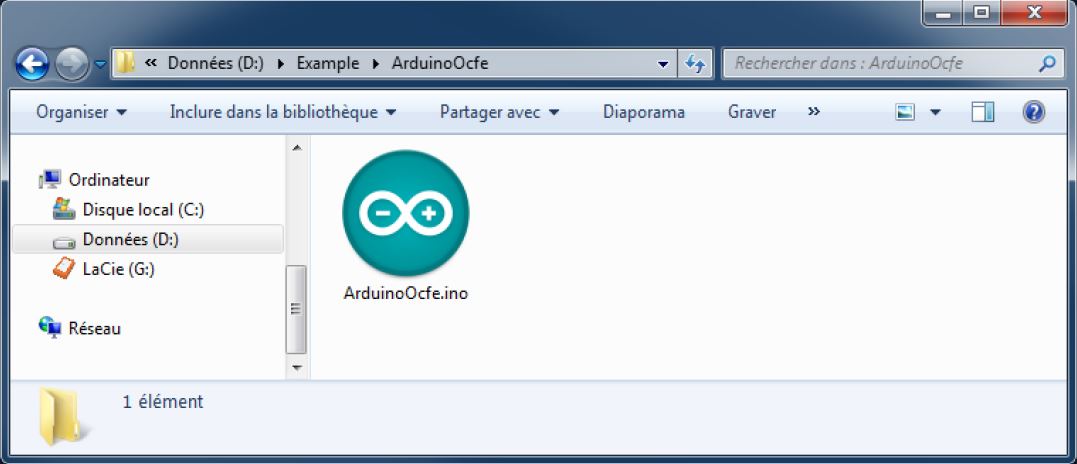
Open the ArduinoOcfe.ino file with “Arduino Ide”
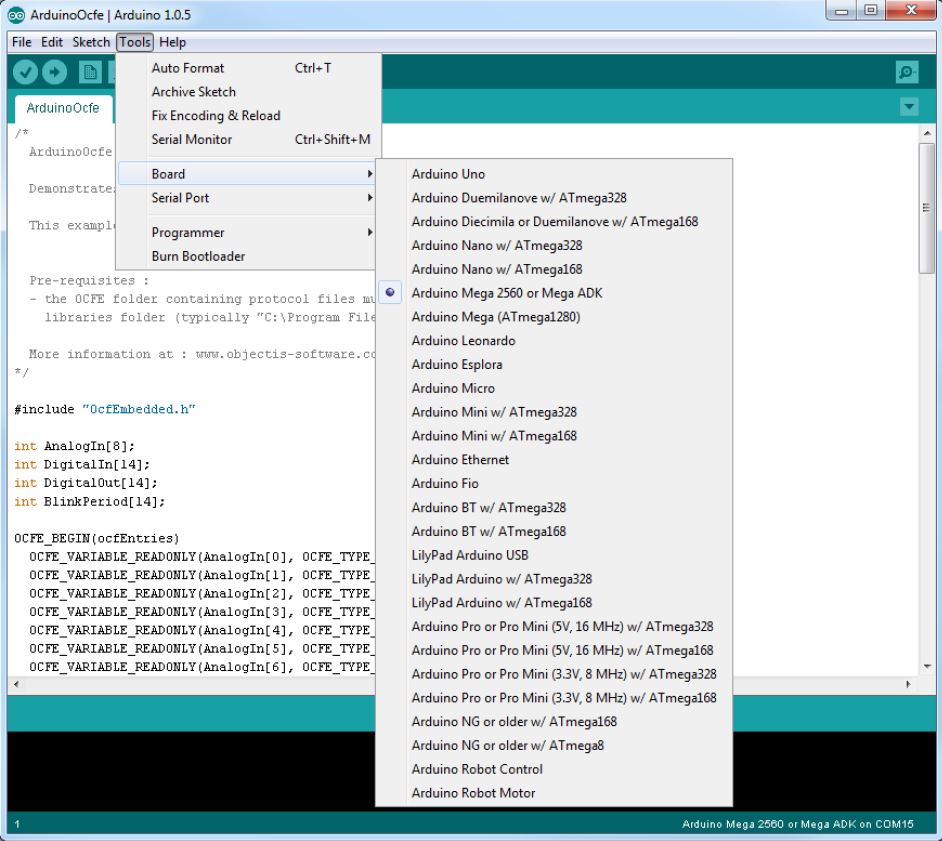
Select the Board model matching your Arduino
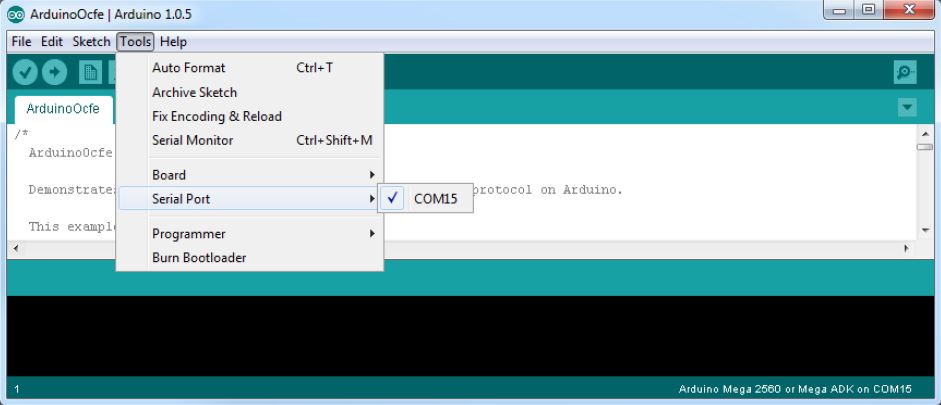
Connect your Arduino to USB port and select the corresponding communication port:
Compile and upload to the Arduino
2.5 Test and enjoy with oStudio – Live Tuning
-
- Once the example is uploaded, the Output 13 Led should blink with a 1 second period.
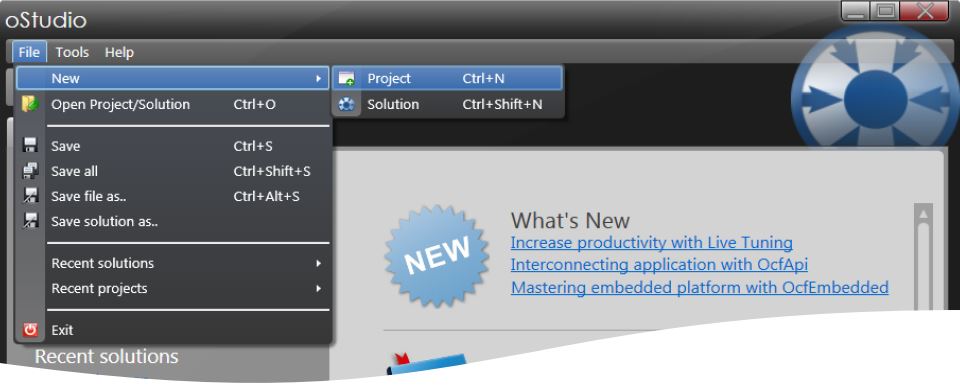
- From the Windows start menu, open “oStudio”.
- Select menu File/New/Project.
-
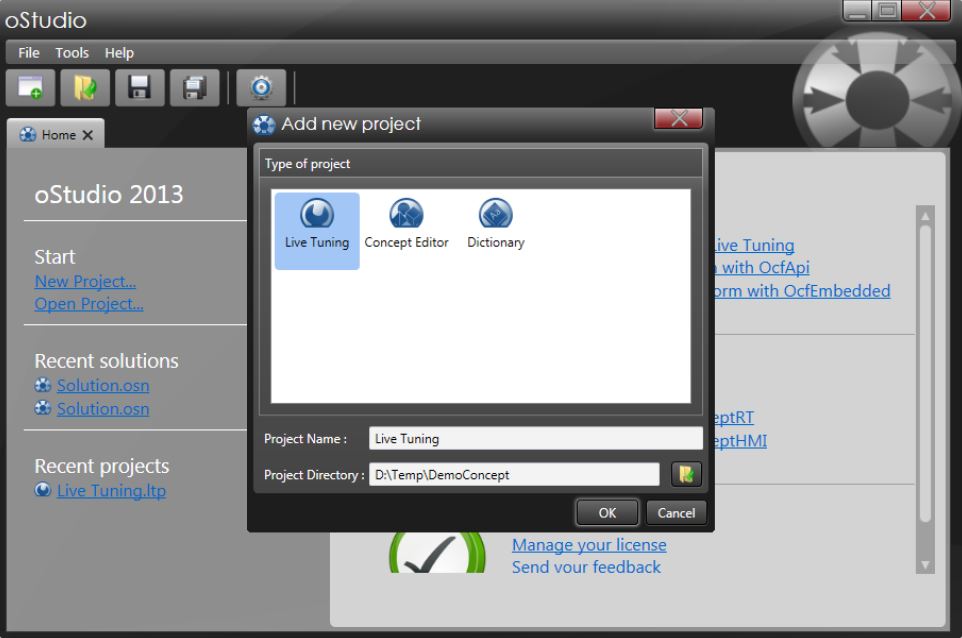
- In the “Add new project” dialog, select the “Live Tuning” project type, fill in the project name and select the desired folder, then click OK.
-
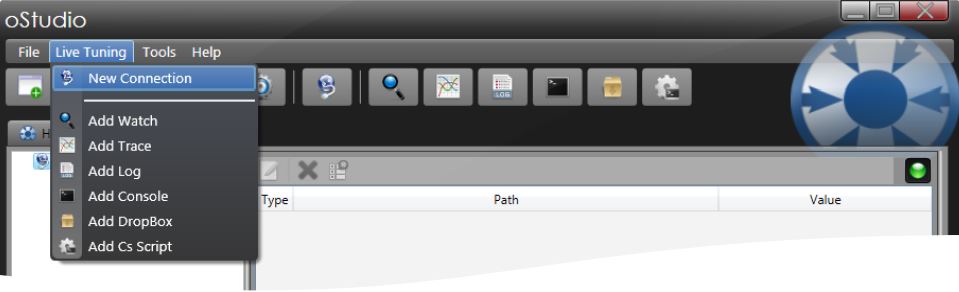
- From the menu “Live Tuning”, select “New connection” :
-
- In the “Add New connection” dialog, select “Embedded Com”, this is the communication protocol for Ocf Embedded through a serial “Com” port.
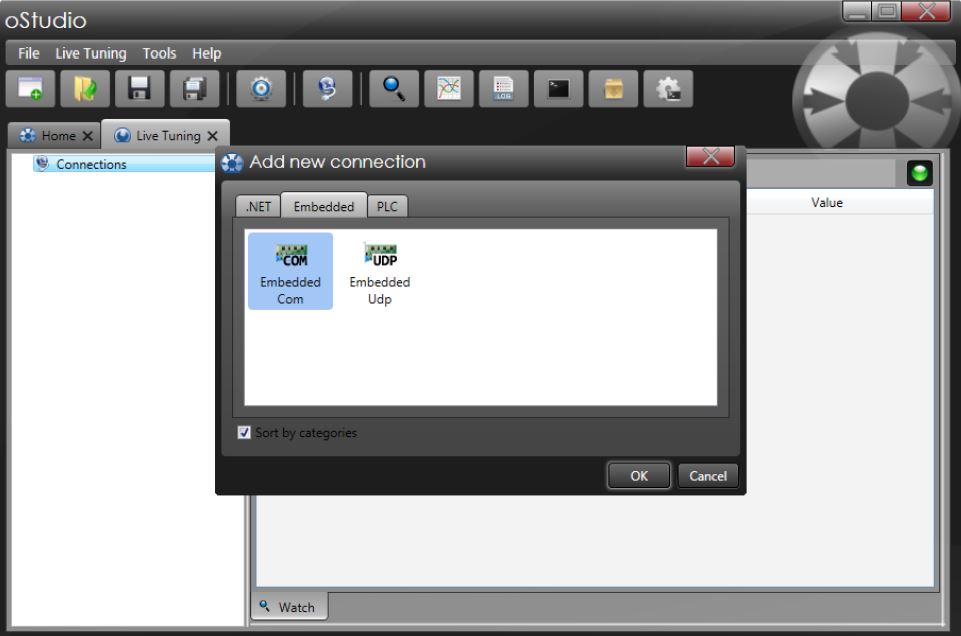
-
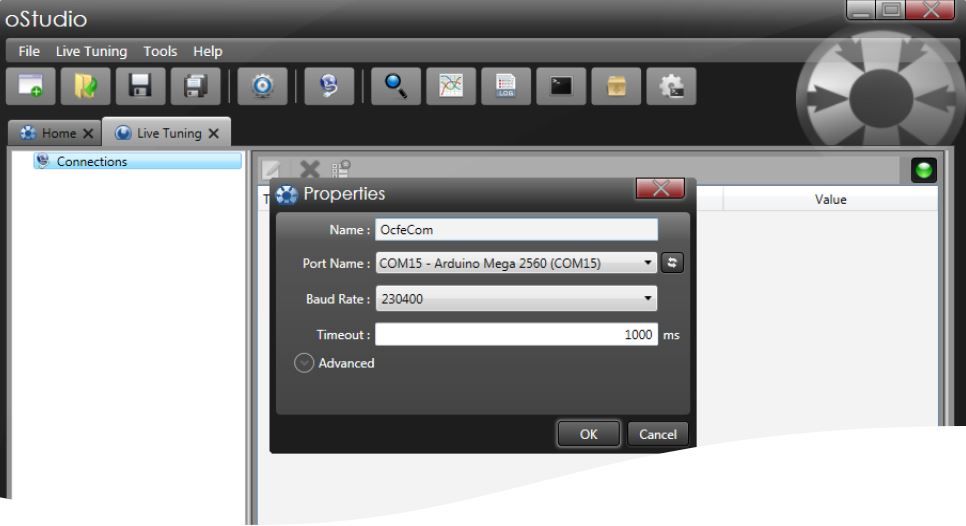
- In the “Properties” dialog, fill in the appropriate communication parameters :
- Select the “Com” port corresponding to your Arduino.
- Select the baud rate “230400” to match the settings in the example program.
- Click ok.
- In the “Properties” dialog, fill in the appropriate communication parameters :
-
- Browse the published variables
All the variables published by the example program through the OCFE protocol are exported in the following section of the source code:
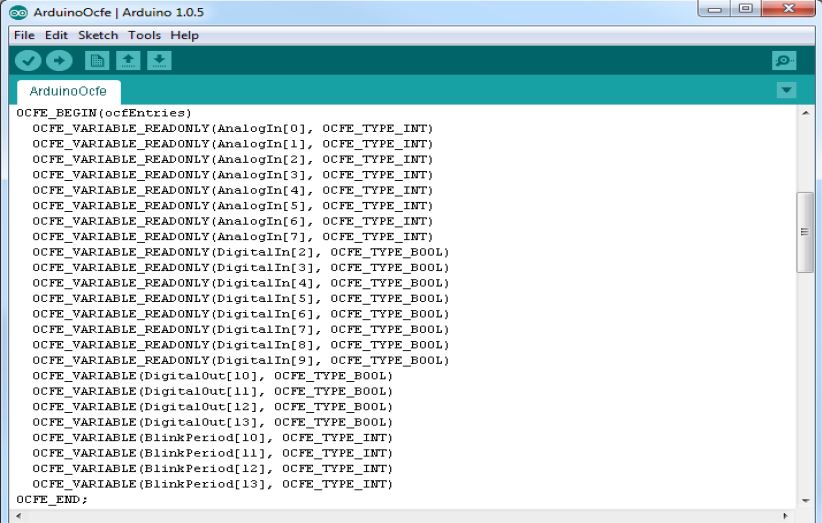
The list of published variables can easily be changed to match your own application. See the Ocfe programmer guide for more information.
All those metadata are read by oStudio when connecting to the Arduino target (or when F5 key is pressed to refresh the tree). So, once connected to the Arduino, oStudio let you immediately browse all those variables with the left tree view.
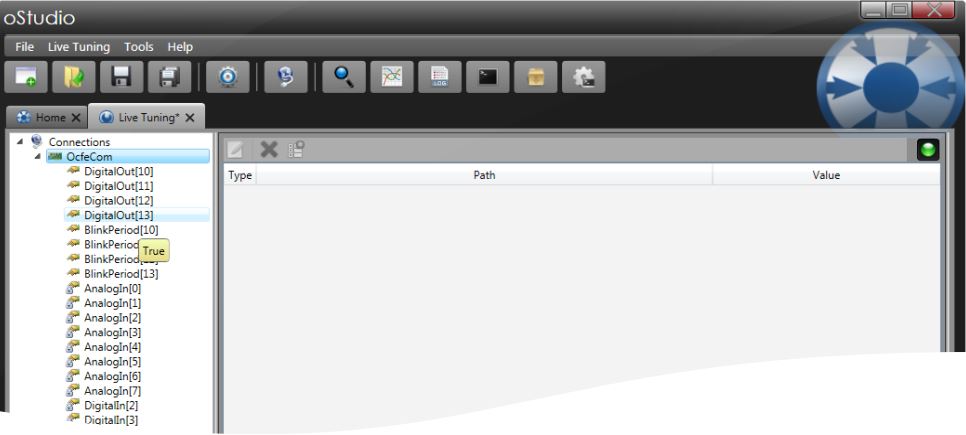
While the mouse cursor is moving around a variable name, a tooltip appears displaying the current value of the variable, retrieved through OCFE protocol.
-
- Monitor the variables
Simply drag drop a variable from the tree on the left to the watch pane on the right.
The variable is monitored, and the value is continuously updated.
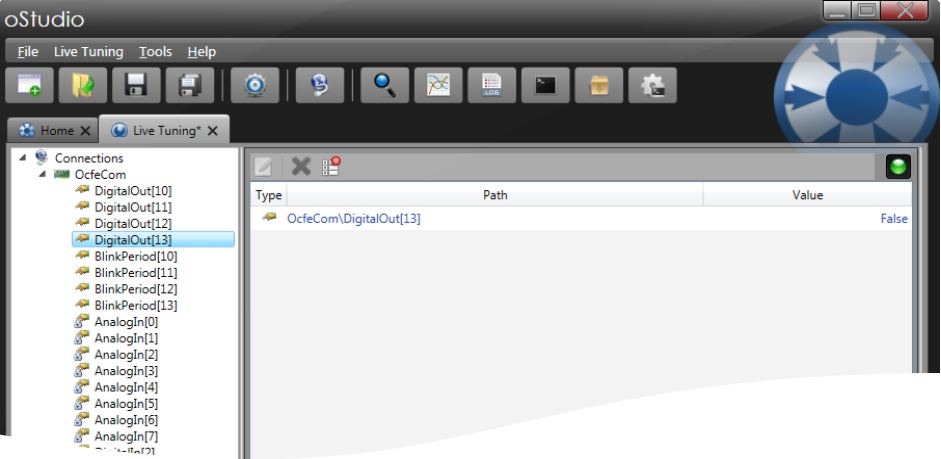
Doing so with the DigitalOutput[13] that is blinking, you will see the toggling of the variable in the watch pane.
-
- Remotely change the value of a variable
A double click on any variable will open the “Field invocation” dialog. This dialog will let you type a new value for the variable that will be applied with the “Apply” button.
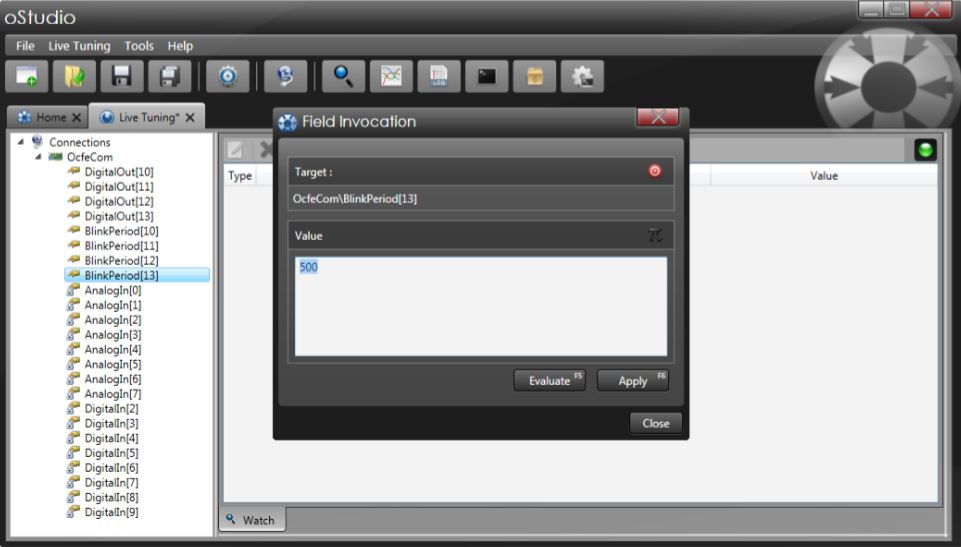
To test this functionality, you can change the blink period of the digital output 13 by setting a new value to BlinkPeriod[13] (for example, set the value 500 to set the blink period to 500 ms). In this Arduino ocfe example application, setting the blink period to 0 will stop blinking.
In the same way, you can write the value of a DigitalOutput, by writing the corresponding variable.
-
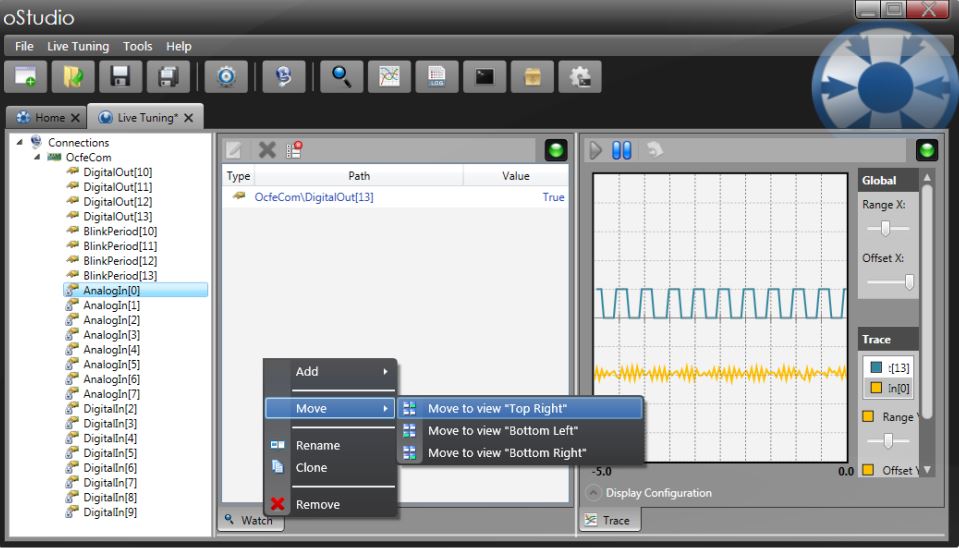
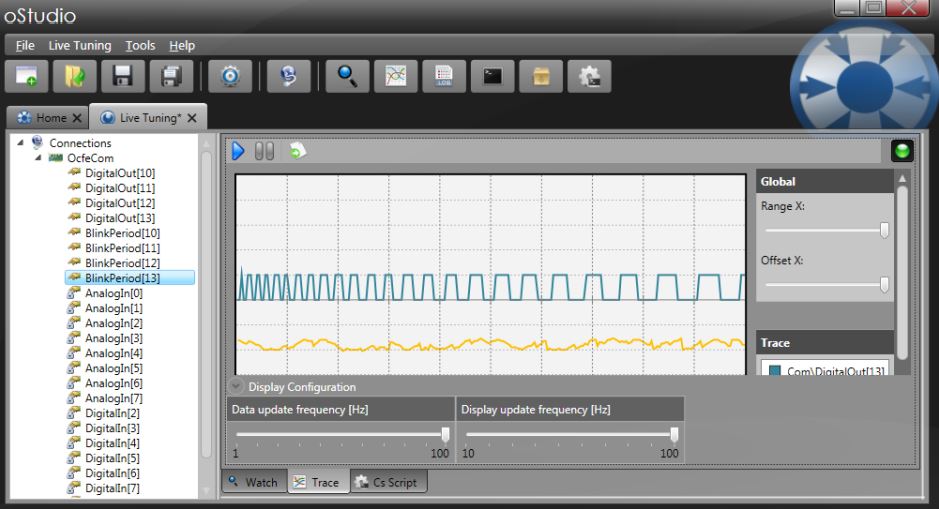
- Tracing a variable
A right click in the tabs will let you create new panes.
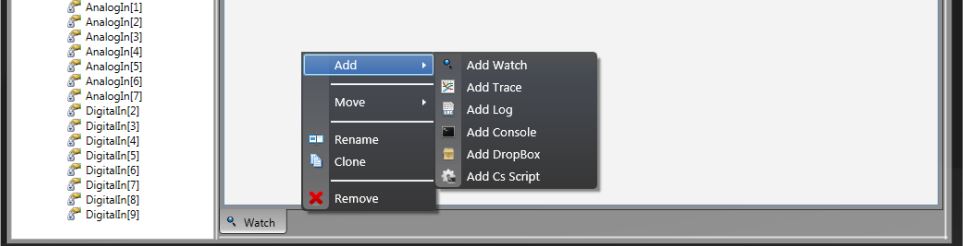
Create a new trace pane, and simply drag-drop the variables to trace into this new pane.
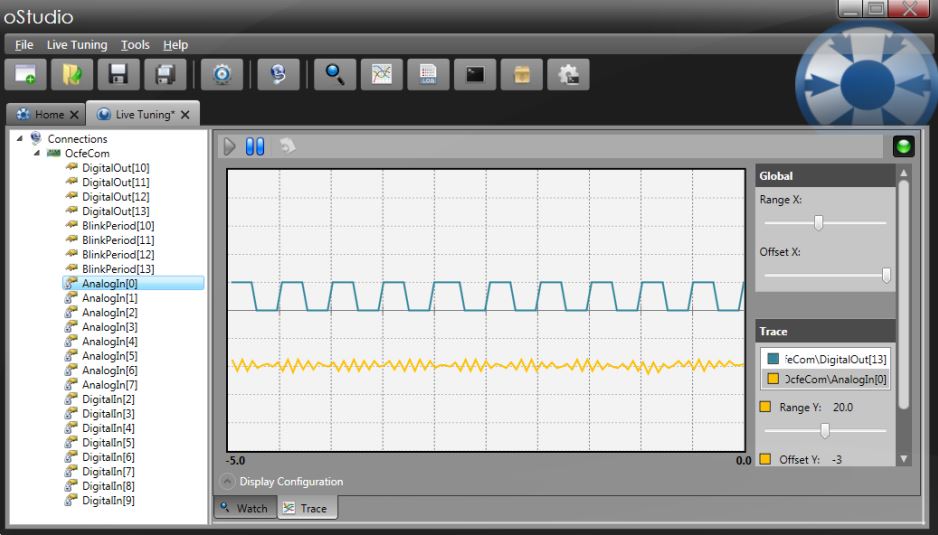
In the picture above, the variables DigitalOut[13] and AnalogIn[0] are plot.
oStudio let you organize your panes in multiple views :
-
- Scripting
oStudio offers many additional functionalities, that are extremely useful to tune an application. We will finish by writing a small C# script demonstrating how to write a variable.
Simply create a new pane “CsScript”, which let you write some C# code that will be compiled on the fly.
To read or write a variable into the Arduino using Ocfe, simply use the path of the variable and read it or write it as usual with the “=” operator. To make this more easy, you can also simply drag drop a variable from the tree to the script pane.
As an example, we will write a script that slowly changes the blinking period from 0 to 500 ms for output 13.
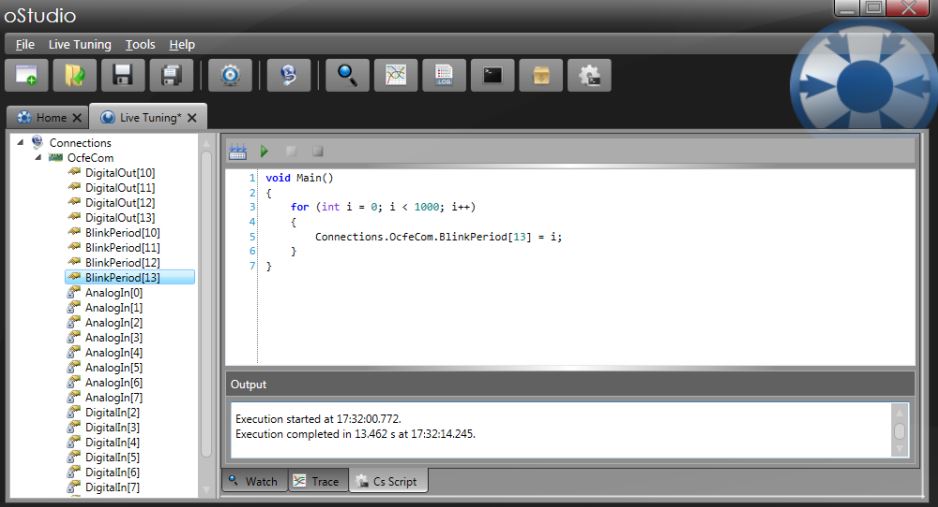
Click on the run button. The blink period will slowly increase from very fast to normal blinking. The result is cleary visible on the Trace below :
Keep in mind that Ocfe is dynamic typed, so it is sometimes better or even required with C# scripts to use type cast to ensure proper execution.
The code written as scripts in oStudio can also be integrated into your own plain .Net applications.
To do so, you simply need to download the OcfApi, an extremely easy to use library.
3. More to do with oStudio – Live Tuning
Our experience is that oStudio, the live debugging tool, dramatically improves the development efficiency and the tuning of embedded systems.
We wish that you will also get a lot of benefits from oStudio in your own projects.
You can go further with Ocf solutions :
- OcfNative is a communication protocol that let you monitor in the same easy way any of your plain .Net applications. Simply publish your objects with a few lines of code and oStudio let you grab into your application.
- “OcfNative AES encrypted“ let you achieve the same results with a high level of security on open networks.
- OcfApi let you very easily integrate Ocf protocols into your own .Net applications in a snap. That way, Ocf is not only a debugging facility, but a first class communication solution.
Ocf is a simple and efficient object oriented communication solution that simplifies to the extreme the interoperability of applications.
OBJECTIS is continuously working on improving oStudio and Ocf to deliver excellent solutions to the community. We will appreciate your feedbacks.