ConceptHMI Web Help
Defining and managing customer licenses in an application
An application may have special features which should be made available only on the acquisition of a license. ConceptHmi provides an application licenses manager that helps you put together try & buy solutions, enabling your customers to try for a number of days your last must-have feature. With this licenses manager these features can be easily enabled or disabled, based on time or computer-linked information limitations. In this chapter you will see how to set up Concept Licenses management in your application.
This service gives the ability to enable or disable features in your application with a license file. It can be used to sell features as supplement to the basic package or to sell application as feature packages. It is even possible to deliver a license limited in time for a demo or to charge for services each year.
The licensed features of the application are defined with an enumeration. As an example, we will create one which will be giving access to the choice of the language of the application.
Create an enumeration and add an enumerator for each licensed features. To add a description to a feature use the EnumIntlDetail attribute.
 |
The EnumIntlDetail attribute gives the ability to define a translatable text, for more information see translating a complete application chapter. |
public enum ApplicationFeatures
{
    [EnumIntlDetails("Framework.ApplicationFeatures.LanguagesModification", "Enable or disable the languages choice")]
    LanguagesModification
}
In order to make the licensed features work with your application, they have to be added to the license repository. To do that, use the initialize method of license repository. The first parameter is the type of enumeration features and the second parameter is the time interval used to periodically check the features validity.
private void InitializeLicense()
{
    LicenseRepository.Instance.Initialize(typeof(ApplicationFeatures), TimeSpan.FromSeconds(1));
}
The XAML markup extension feature can be used to restrict access to any controls. This markup extension is mostly used on the following properties: IsEnabled and Visibility. A force of this markup extension is that we can precisely select the control to restrict. It gives us great freedom because it is possible to restrict a simple button or an entire page.
In this first example, we disable the languages pages if the licence is not valid with the IsEnabled property.
<concept:ConceptLanguagesView IsAdminMode="True"
    IsEnabled="{concept:Feature {x:Static local:ApplicationFeatures.LanguagesModification}}"/>
The markup extension feature can also be used on the Visibility property. In this case, it is possible to set the visibility used when the licence is not valid, by default the collapsed visibility is used.
<concept:ConceptLanguagesView IsAdminMode="True"
    Visibility="{concept:Feature {x:Static local:ApplicationFeatures.LanguagesModification}, Hidden}">
It is also possible to check if the feature is allowed in a C# code. To do that, use the IsAllowed method of LicenseRepository.
if (LicenseRepository.Instance.IsAllowed(ApplicationFeatures.LanguagesModification))
{
}
 |
The IsAllowed method isn't designed to work with a combination of enum values (flags) using an operator like the conditional-OR operator. Using these operators won't generate a compiler error or an exception but the obtained result won't be correct. |
Concept provides a control designed to manage licenses in an application. This control is the ConceptSignedLicenseFilesView.
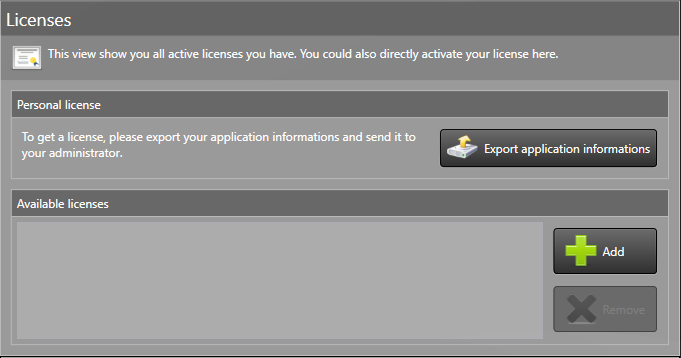
Below is an example of use of the ConceptSignedLicenseFilesView. Simply add this control to the view of your choice to see it displayed in your application. The behavior shown above will be automatically available.
<concept:ConceptSignedLicenseFilesView/>
The simplest way to dynamically add or remove a license file from the application is to use the add button and the remove button of the license management view provided by Concept.
If you would like to develop your own control, it can also be done by manually copying and removing the license files from the license directory. The LicenseRepository automatically checks if a license file is added or removed from the license directory. Below is an example of how to add a license in C#.
private void AddLicense()
{
    OpenFileDialog dialog = new OpenFileDialog();
    dialog.Filter = LicenseRepository.LicenseFileFilter;
    if (dialog.ShowDialog() == true)
        File.Copy(dialog.FileName,
            System.IO.Path.Combine(LicenseRepository.Instance.LicenseDirectory, System.IO.Path.GetFileName(dialog.FileName)), true);
}
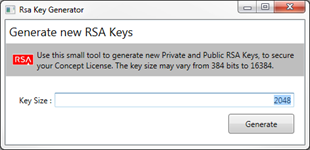
To generate and read a license file RSA encryption is used in combination with a private and a public key. The private key is used to sign the license file and the public key is used by the application to check the signature and read the license file.
Here's a small tool developed by Objectis to generate RSA keys. Set the key size from 384 bits to 16384 bits and generate the private key and the public key.
|
The private key must be kept preciously and must not be transmitted to anyone. The person who has the private key can generate license files. |
To generate a license with oStudio information about the computer and the features of the application is needed.
The LicenseRepository class contains the ExportLicenseCreationData method which can be used to export a file with the necessary data (such as information about the computer and the application) to generate licenses. For example, the computer information can be used to to bind a license to a mac address.
The ConceptSignedLicenseFilesView provided by Concept integrates the exportation process of this information file. Simply click on the "Export application information" button and choose the destination of your choice. If you need help to integrate this view in your application, have a look at the chapter How to integrate the license management window.
|
You can download the oStudio installer here: http://www.objectis-software.com/download-ostudio-2013/ |
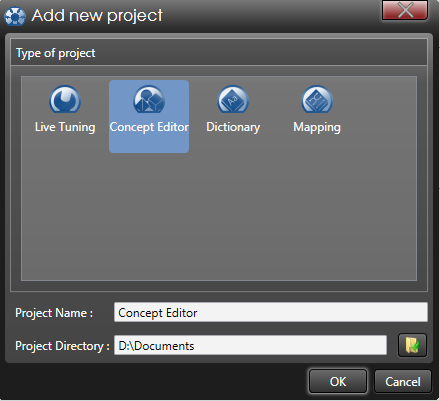
First you must create a new oStudio - Concept Editor project, go to file > new > project (Ctrl + N). Then choose Concept Editor as project type and define the project name and his location.
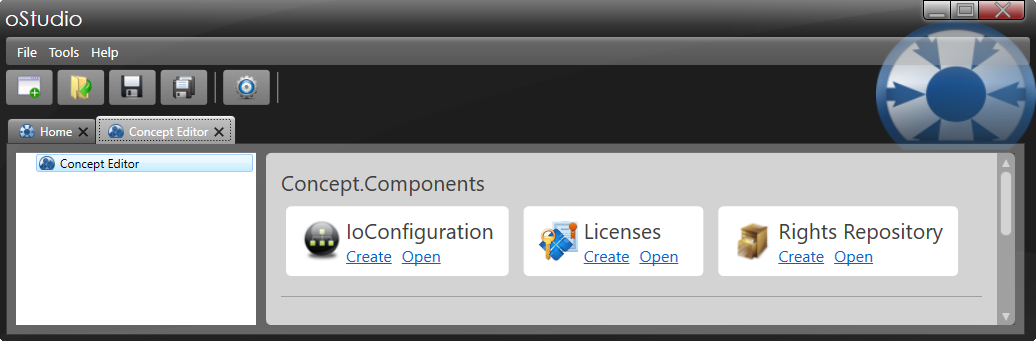
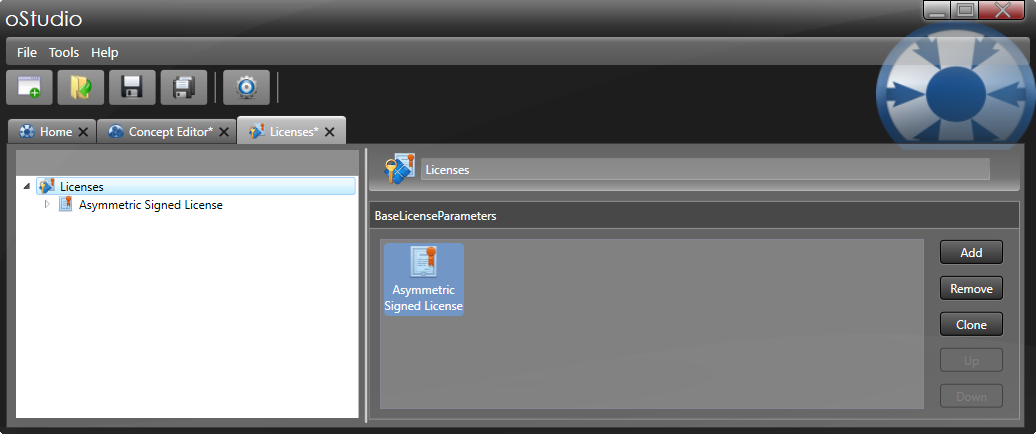
Once the Concept Editor project is created, the screen shown below will appear. On the right part of the page, choose create licenses.
When the license project is created, the page below will be made visible. Click on the button Add and create an asymmetric signed license.
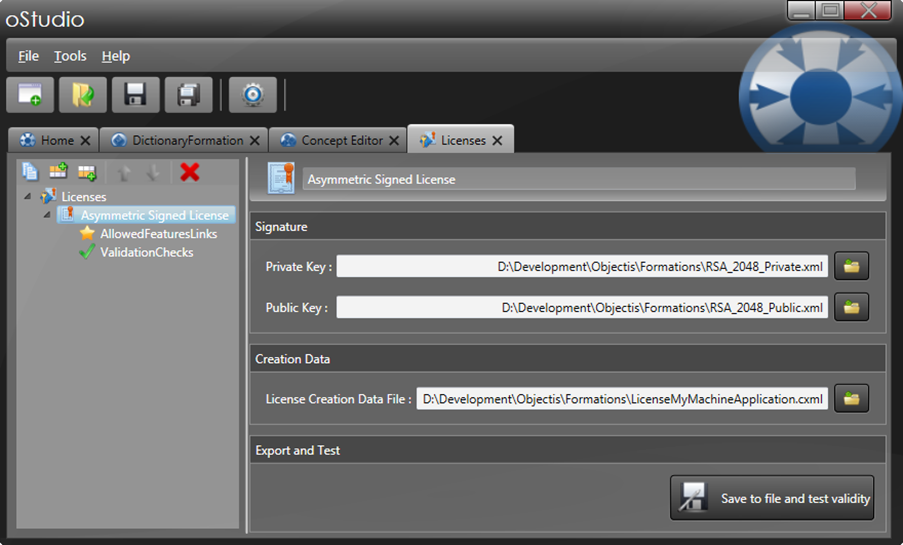
At the root of an asymmetric signed license, the RSA keys and the application information file (see retrieving information about the PC and the features application) are required. Press
the button located at the bottom of the page (Save to file and test validity) to generate the license file when everything is set.
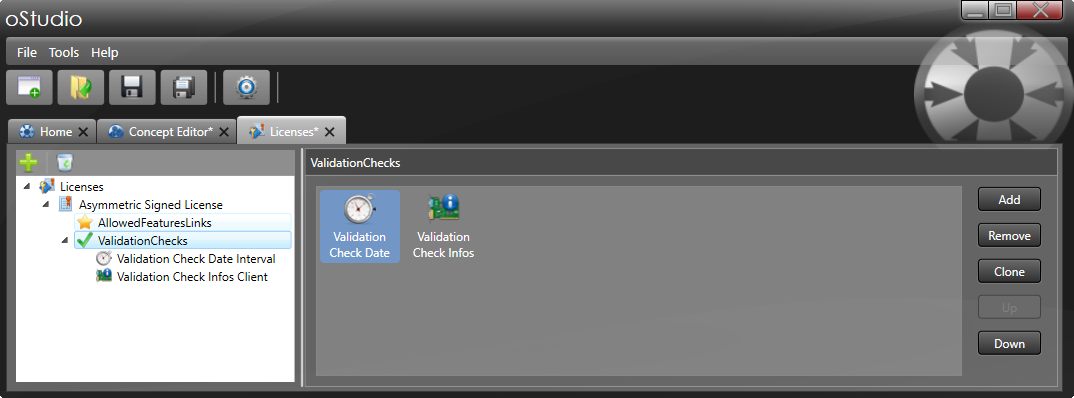
In the allowed features links menu, choose the features unlocked by this license.

In the validation checks page, verifications by date or computer information can be added to the license. The information used in validation check is provided by the application information file created in the chapter retrieving information about the PC and the features application.
To verify the signature of a generated license file the public key is required in the application. To embed the public key directly in the application follow these steps :
|
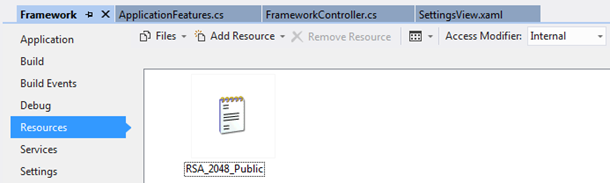 |
To set the public key in the LicenseRepository of Concept, modify the initialize method as follow.
private void InitializeLicense()
{
    LicenseRepository.Instance.Initialize(typeof(ApplicationFeatures), TimeSpan.FromSeconds(1));
    LicenseRepository.Instance.RsaPublicKeyXml = Properties.Resources.RSA_2048_Public;
}
Below are the main components necessary to set up customer licenses in an application.
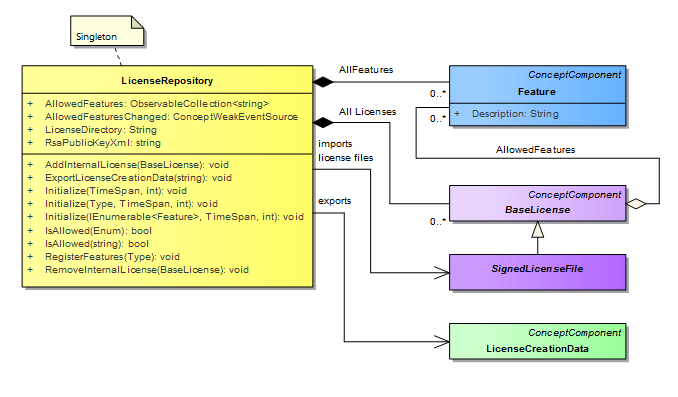
The LicenseRepository class is a singleton which encapsulates the features (Feature) and the licenses (BaseLicense) of the application. All Licenses composition represents the licenses files imported into the application. Each imported license file unlocks the associated features described by the AllowedFeatures aggregation. The LicenseCreationData class is used to export necessary data to generate licenses in an external tool.