ConceptHMI Web Help
Extending an application via plug-ins
When developing an application, certain functionalities must be added or removed dynamically without rebuilding the Visual Studio solution.
To resolve this problematic, Concept provides a plug-in mechanism enabling to extend an application with new features. The new functionalities are developed in a separate project whose built DLL must be integrated to the Framework project. This mechanism makes the following possible :
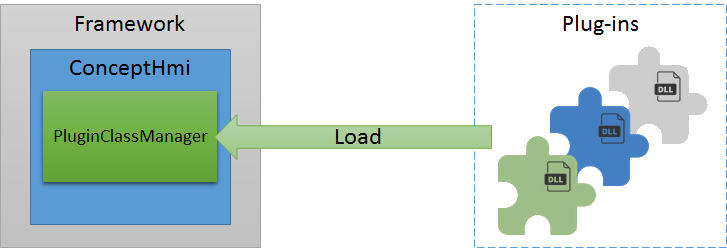
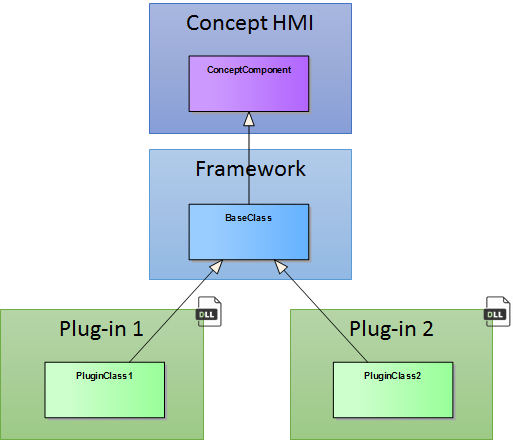
The loading of plug-ins is done on application startup by the ConceptBootstrapper or when a plug-in is added with the help of the dedicated control ConceptPluginsView. The PluginClassManager class is in charge of loading the plug-ins (dll) as shown below.
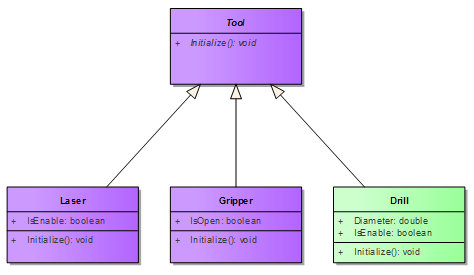
To demonstrate the use of plug-ins, we are going to work with the Tool class of the Framework project. The Framework already contains two tools, the laser and the gripper. In this example, we will add the drill tool to the application as a plug-in .
To create a new plug-in, the first step is to set up the project. The following steps will guide you through the project creation:
The second step is to create classes and inheritances. The following steps will guide you through this part :
using Framework;
namespace Tools
 {
    public class Drill: Tool
    {
        public override void Initialize()
        {
            // Initialization
        }
        public double Diameter {get; set;}
        public bool IsEnable {get; set;}
    }
}
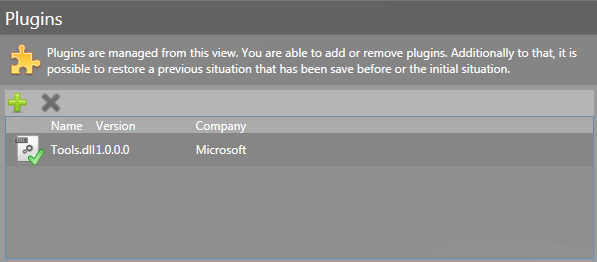
The simplest way to manage plug-ins in your application, is to use the control provided by Concept. With this control, plug-ins can be added or removed dynamically from your application.
Below is an example of use of the ConceptPluginsView. Simply add this control to the view of your choice to see it displayed in your application. The behavior shown above will be available automatically.
<concept:ConceptPluginsView/>
If you want to create your own control or load plug-ins in a custom way, it has to be done in C#. Concept provides the PluginClassManager class which contains the method LoadAssembly. This method loads a plug-in based on its path.
The example below shows how to load all the plug-ins contained in a specific folder with the PluginClassManager. Usually, the plug-ins are loaded through the load method of the application bootstrapper. To setup the application bootstrapper, see starting new application topics.
public const string PluginExtension = "*.dll";
public const string PluginFolder = "Plugins";

public static IEnumerable<string> GetPluginsLocation()
 {
     string path = Path.Combine(Path.GetDirectoryName(Assembly.GetExecutingAssembly().Location), PluginFolder);

    if (!Directory.Exists(path))
         yield break;

    IEnumerable<string> pluginsLocation = Directory.EnumerateFiles(path, PluginExtension);

    foreach (string location in pluginsLocation)
         yield return location;
 }

public static void LoadPlugins()
 {
     MessageCollection messageCollector = new MessageCollection();
     foreach (string location in GetPluginsLocation())
     {
         PluginClassManager.LoadAssembly(location, messageCollector);
         if (messageCollector.Count > 0)
             ConceptMessage.ShowWarning(messageCollector.Text);
     }
 }
To work correctly, it is important that each plug-ins respects the following rules :